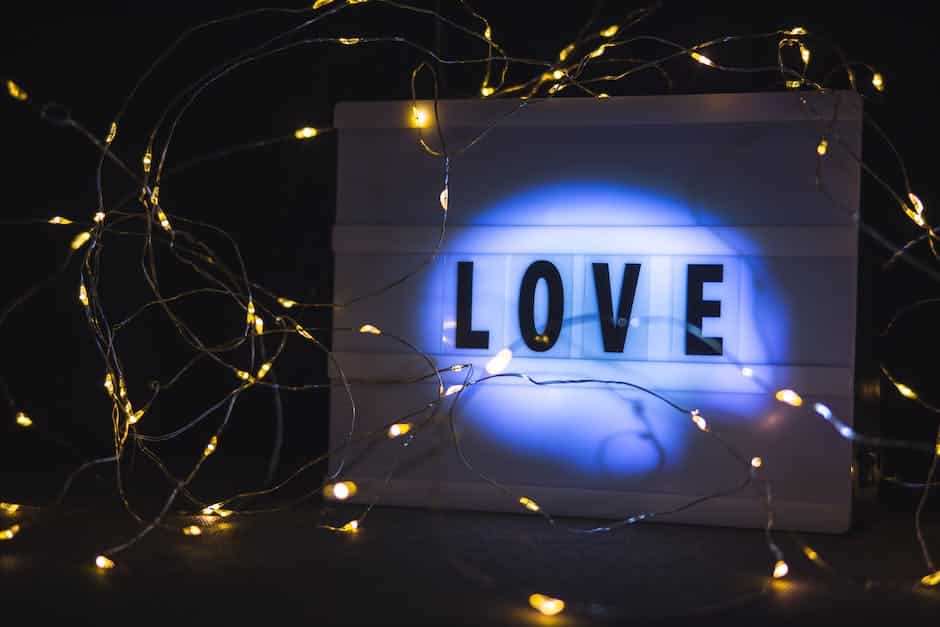
Let’s get into it! In this article, we will be talking about one of my favorite styles of lettering — light up letters. I will go over all of the components of these letters, how to draw them, and some tricks you can use to make your designs more effective.
There are three main types of light up letters - vertical, horizontal, and diagonal. We will start with the basics of creating vertical light up letters before moving onto exploring other style variations.
Once you have mastered the art of making beautiful vertical light up letters, then you can move onto trying out different shapes and patterns. By adding additional elements like lines or dots to break up the shape, new textures and shades of color can be created.
We will also take a look at some easy ways to add glitter and sparkles to create glimmering lights.
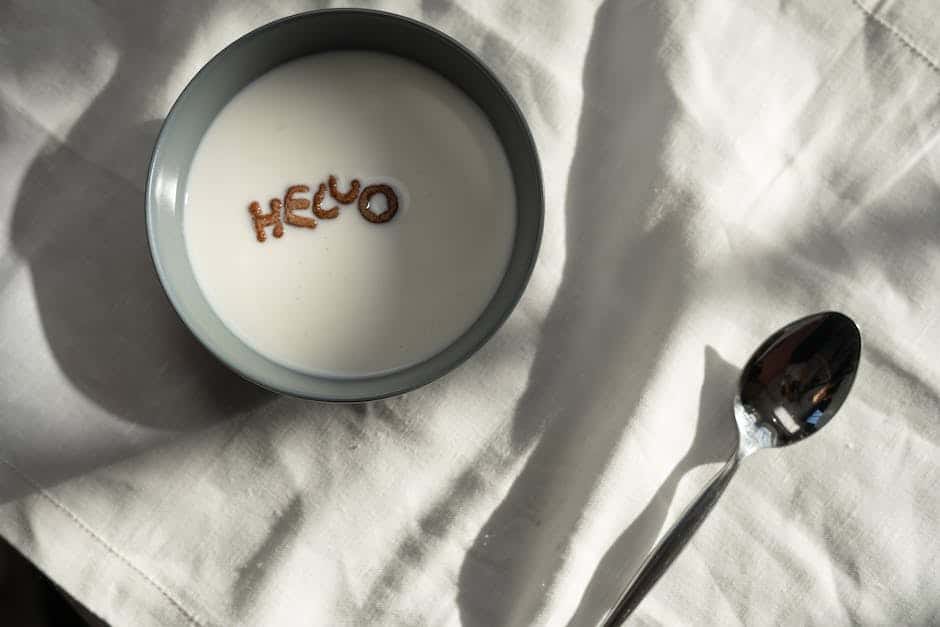 A light up letter is also known as an animated or blinking font. These are fonts that do not exist in nature, but you can create them!
You will need a computer with Photoshop (or another photo editing software) installed. The easiest way to start is by going into Google Image Search and looking through samples of letters. You want to make sure there is no copyright infringement before downloading anything.
Once you have found one you like, go into photoshop and make a new document. Let’s say your chosen light up letter is ‘A’, so we will name this newly made image file ‘letter-a.png’. Now, go across the top bar and select “New” from the drop down box. Then choose either “Photograph” or “Image”, depending on what type of layer you wanted to make it be.
Next, choose where you would like the background to be placed, then hit crop. Keep the rest of the settings the same and drag and drop the photograph onto the canvas. Save and close when done!
Your new, custom text element has been saved as a Photoshop layer now. To apply the light up effect, simply hold down shift and click twice on each letter to activate the tool.
A light up letter is also known as an animated or blinking font. These are fonts that do not exist in nature, but you can create them!
You will need a computer with Photoshop (or another photo editing software) installed. The easiest way to start is by going into Google Image Search and looking through samples of letters. You want to make sure there is no copyright infringement before downloading anything.
Once you have found one you like, go into photoshop and make a new document. Let’s say your chosen light up letter is ‘A’, so we will name this newly made image file ‘letter-a.png’. Now, go across the top bar and select “New” from the drop down box. Then choose either “Photograph” or “Image”, depending on what type of layer you wanted to make it be.
Next, choose where you would like the background to be placed, then hit crop. Keep the rest of the settings the same and drag and drop the photograph onto the canvas. Save and close when done!
Your new, custom text element has been saved as a Photoshop layer now. To apply the light up effect, simply hold down shift and click twice on each letter to activate the tool.
 Molds can be made out of either plastic or clay. If making one from plastic, you will need to cut it down later so that you can shape it properly. A cheap printer makes great letter trays!
If making one from clay, you will have to bake it before using it. This is very important as wet clays may not stick correctly onto your letters! You could also use cookie dough instead of clay if you like. Just remember to let it dry completely beforehand.
Now, take your new letter tray and run some warm water over it. It should feel slightly soft and flimsy.
Molds can be made out of either plastic or clay. If making one from plastic, you will need to cut it down later so that you can shape it properly. A cheap printer makes great letter trays!
If making one from clay, you will have to bake it before using it. This is very important as wet clays may not stick correctly onto your letters! You could also use cookie dough instead of clay if you like. Just remember to let it dry completely beforehand.
Now, take your new letter tray and run some warm water over it. It should feel slightly soft and flimsy.
 The next step in creating light up letters is tracing your pattern or shape into photopolymer plate material. This can be done with either clear plastic sheets that you glue together or gel plates where the gel solidifies as it dries.
The first thing you will need to do is determine how many lights or shadows you want to have in each letter. This depends mostly on space, thickness, and style of font.
For example, if your letter is made out of very thin layers then only one layer of light would show through which does not look good so make those thinner fonts much thicker!
Thicker versions of the same font may also include more than one shadow which would create an interesting effect.
The next step in creating light up letters is tracing your pattern or shape into photopolymer plate material. This can be done with either clear plastic sheets that you glue together or gel plates where the gel solidifies as it dries.
The first thing you will need to do is determine how many lights or shadows you want to have in each letter. This depends mostly on space, thickness, and style of font.
For example, if your letter is made out of very thin layers then only one layer of light would show through which does not look good so make those thinner fonts much thicker!
Thicker versions of the same font may also include more than one shadow which would create an interesting effect.
 The next step in creating light up letters is to cut out your patterns! This can be done with either computer-generated or handmade patterns. If you have access to a printer, this is very easy to do!
You will need an appropriate size paper surface for cutting your patterns. A template plastic sleeve works great because you can easily pull it away when finished. Paper that is heavier than regular weight paper (think plain white photocopy paper) work well too.
Once your background layer of paper is ready, add some adhesive to the area where your letter will go. Then place your pattern face down onto the paper and stick it there!
Now take your shape layer and pick a color. Let’s use red as our example again. Place your red pen directly ON TOP OF THE ADHESIVE BOTTOM LAYER. It does not need to contact the background paper, but it should fully cover it.
Press down hard using short, quick strokes. You want to create a solid line, NOT a fuzzy one. When you are done, let up on the pressure and see what colors mix together!
If needed, repeat these steps with other shapes and colors to match your design. Your text could also have different styles such as bold, italicized, underlined, etc.
The next step in creating light up letters is to cut out your patterns! This can be done with either computer-generated or handmade patterns. If you have access to a printer, this is very easy to do!
You will need an appropriate size paper surface for cutting your patterns. A template plastic sleeve works great because you can easily pull it away when finished. Paper that is heavier than regular weight paper (think plain white photocopy paper) work well too.
Once your background layer of paper is ready, add some adhesive to the area where your letter will go. Then place your pattern face down onto the paper and stick it there!
Now take your shape layer and pick a color. Let’s use red as our example again. Place your red pen directly ON TOP OF THE ADHESIVE BOTTOM LAYER. It does not need to contact the background paper, but it should fully cover it.
Press down hard using short, quick strokes. You want to create a solid line, NOT a fuzzy one. When you are done, let up on the pressure and see what colors mix together!
If needed, repeat these steps with other shapes and colors to match your design. Your text could also have different styles such as bold, italicized, underlined, etc.
 Stencils are a fun way to add some depth to your design projects! You can use them as decorations, or even to create new designs. They’re also very helpful in creating strong shapes, so if you want to learn how to draw, they’re great to know!
A stencil is just like any other item with repeated patterns. The only difference is that you don’t cut it out completely; instead, you pull off certain parts to leave an empty space where the pattern repeats. These spaces are called holes.
The trickiest part of making a good stencil is figuring out what shape to make the hole. It needs to be sturdy, but at the same time it should not be too thick, otherwise it won’t let the air through which creates ugly lines and bubbles.
There are several ways to do this. You could trace around the edge of the object, take away whatever material is left, or you could use the opposite side of the paper. All these methods depend on your starting material and what type of project you will be doing with yours!
Another important thing about shaping the holes is whether you want every one to look the same or not. If there are some that have bigger gaps than others then it becomes more interesting to see how much pressure was put into that area.
Stencils are a fun way to add some depth to your design projects! You can use them as decorations, or even to create new designs. They’re also very helpful in creating strong shapes, so if you want to learn how to draw, they’re great to know!
A stencil is just like any other item with repeated patterns. The only difference is that you don’t cut it out completely; instead, you pull off certain parts to leave an empty space where the pattern repeats. These spaces are called holes.
The trickiest part of making a good stencil is figuring out what shape to make the hole. It needs to be sturdy, but at the same time it should not be too thick, otherwise it won’t let the air through which creates ugly lines and bubbles.
There are several ways to do this. You could trace around the edge of the object, take away whatever material is left, or you could use the opposite side of the paper. All these methods depend on your starting material and what type of project you will be doing with yours!
Another important thing about shaping the holes is whether you want every one to look the same or not. If there are some that have bigger gaps than others then it becomes more interesting to see how much pressure was put into that area.
 Molds can be made out of many different materials, such as plastic or glass. If you have access to a kitchen appliance that uses cooling gel, this would make a great material for your mold.
By having a gelatin-based base, you will be able to use the liquid contents of the bottle to easily pour the polymer into the mold.
After it is dry, you can then melt down the plastic and shape the light up letter. You can now add decorations or designs to match the rest of the letters in the word!
General tips: remember that your plaster and gel mixture needs to set properly before moving onto the next step! This could take anywhere from an hour to days depending on the mix.
The next step in creating light up letters is tracing your pattern into shape. You will need two pieces of paper for this process. One piece should be white, and the other can be any color you want your letter to be!
To begin with, make sure both pieces of paper are very smooth and clean. Then, use the white paper as the template and trace the outline of your letter onto the colored paper.
Once that is done, you can now go back over the traced line with a fine tooth brush and some strong rubbing alcohol to remove the excess ink from the painted surface. Let it dry completely before applying the third layer.
Molds can be made out of many different materials, such as plastic or glass. If you have access to a kitchen appliance that uses cooling gel, this would make a great material for your mold.
By having a gelatin-based base, you will be able to use the liquid contents of the bottle to easily pour the polymer into the mold.
After it is dry, you can then melt down the plastic and shape the light up letter. You can now add decorations or designs to match the rest of the letters in the word!
General tips: remember that your plaster and gel mixture needs to set properly before moving onto the next step! This could take anywhere from an hour to days depending on the mix.
The next step in creating light up letters is tracing your pattern into shape. You will need two pieces of paper for this process. One piece should be white, and the other can be any color you want your letter to be!
To begin with, make sure both pieces of paper are very smooth and clean. Then, use the white paper as the template and trace the outline of your letter onto the colored paper.
Once that is done, you can now go back over the traced line with a fine tooth brush and some strong rubbing alcohol to remove the excess ink from the painted surface. Let it dry completely before applying the third layer.
 The next step in building your own light up letters is painting your mold. You will want to make sure that you are very careful with this process as it can be slightly tricky or even dangerous depending on what letter shape you choose.
You will need some strong, transparent gel glues such as epoxy glue or clear plastic glue. Make sure to mix them properly and apply a thin layer of glue onto each surface of your mold.
Once all the surfaces of your mold have been glued together, let the glue dry for an hour before moving on to the next stage. Now you will need to find a way to stick the printed element onto the mold.
The most common way to do this is using hot melt printing. This means heating the back side of the element until it melts and then sticking it into the dried glue on the front of the mold.
The next step in building your own light up letters is painting your mold. You will want to make sure that you are very careful with this process as it can be slightly tricky or even dangerous depending on what letter shape you choose.
You will need some strong, transparent gel glues such as epoxy glue or clear plastic glue. Make sure to mix them properly and apply a thin layer of glue onto each surface of your mold.
Once all the surfaces of your mold have been glued together, let the glue dry for an hour before moving on to the next stage. Now you will need to find a way to stick the printed element onto the mold.
The most common way to do this is using hot melt printing. This means heating the back side of the element until it melts and then sticking it into the dried glue on the front of the mold.
Make a backdrop
A light up letter is also known as an animated or blinking font. These are fonts that do not exist in nature, but you can create them!
You will need a computer with Photoshop (or another photo editing software) installed. The easiest way to start is by going into Google Image Search and looking through samples of letters. You want to make sure there is no copyright infringement before downloading anything.
Once you have found one you like, go into photoshop and make a new document. Let’s say your chosen light up letter is ‘A’, so we will name this newly made image file ‘letter-a.png’. Now, go across the top bar and select “New” from the drop down box. Then choose either “Photograph” or “Image”, depending on what type of layer you wanted to make it be.
Next, choose where you would like the background to be placed, then hit crop. Keep the rest of the settings the same and drag and drop the photograph onto the canvas. Save and close when done!
Your new, custom text element has been saved as a Photoshop layer now. To apply the light up effect, simply hold down shift and click twice on each letter to activate the tool.
Make a mold
Molds can be made out of either plastic or clay. If making one from plastic, you will need to cut it down later so that you can shape it properly. A cheap printer makes great letter trays!
If making one from clay, you will have to bake it before using it. This is very important as wet clays may not stick correctly onto your letters! You could also use cookie dough instead of clay if you like. Just remember to let it dry completely beforehand.
Now, take your new letter tray and run some warm water over it. It should feel slightly soft and flimsy.
Trace your pattern onto film
The next step in creating light up letters is tracing your pattern or shape into photopolymer plate material. This can be done with either clear plastic sheets that you glue together or gel plates where the gel solidifies as it dries.
The first thing you will need to do is determine how many lights or shadows you want to have in each letter. This depends mostly on space, thickness, and style of font.
For example, if your letter is made out of very thin layers then only one layer of light would show through which does not look good so make those thinner fonts much thicker!
Thicker versions of the same font may also include more than one shadow which would create an interesting effect.
Cut out your pattern
The next step in creating light up letters is to cut out your patterns! This can be done with either computer-generated or handmade patterns. If you have access to a printer, this is very easy to do!
You will need an appropriate size paper surface for cutting your patterns. A template plastic sleeve works great because you can easily pull it away when finished. Paper that is heavier than regular weight paper (think plain white photocopy paper) work well too.
Once your background layer of paper is ready, add some adhesive to the area where your letter will go. Then place your pattern face down onto the paper and stick it there!
Now take your shape layer and pick a color. Let’s use red as our example again. Place your red pen directly ON TOP OF THE ADHESIVE BOTTOM LAYER. It does not need to contact the background paper, but it should fully cover it.
Press down hard using short, quick strokes. You want to create a solid line, NOT a fuzzy one. When you are done, let up on the pressure and see what colors mix together!
If needed, repeat these steps with other shapes and colors to match your design. Your text could also have different styles such as bold, italicized, underlined, etc.
Make a stencil
Stencils are a fun way to add some depth to your design projects! You can use them as decorations, or even to create new designs. They’re also very helpful in creating strong shapes, so if you want to learn how to draw, they’re great to know!
A stencil is just like any other item with repeated patterns. The only difference is that you don’t cut it out completely; instead, you pull off certain parts to leave an empty space where the pattern repeats. These spaces are called holes.
The trickiest part of making a good stencil is figuring out what shape to make the hole. It needs to be sturdy, but at the same time it should not be too thick, otherwise it won’t let the air through which creates ugly lines and bubbles.
There are several ways to do this. You could trace around the edge of the object, take away whatever material is left, or you could use the opposite side of the paper. All these methods depend on your starting material and what type of project you will be doing with yours!
Another important thing about shaping the holes is whether you want every one to look the same or not. If there are some that have bigger gaps than others then it becomes more interesting to see how much pressure was put into that area.
Make a mold
Molds can be made out of many different materials, such as plastic or glass. If you have access to a kitchen appliance that uses cooling gel, this would make a great material for your mold.
By having a gelatin-based base, you will be able to use the liquid contents of the bottle to easily pour the polymer into the mold.
After it is dry, you can then melt down the plastic and shape the light up letter. You can now add decorations or designs to match the rest of the letters in the word!
General tips: remember that your plaster and gel mixture needs to set properly before moving onto the next step! This could take anywhere from an hour to days depending on the mix.
Trace your pattern onto paper
The next step in creating light up letters is tracing your pattern into shape. You will need two pieces of paper for this process. One piece should be white, and the other can be any color you want your letter to be!
To begin with, make sure both pieces of paper are very smooth and clean. Then, use the white paper as the template and trace the outline of your letter onto the colored paper.
Once that is done, you can now go back over the traced line with a fine tooth brush and some strong rubbing alcohol to remove the excess ink from the painted surface. Let it dry completely before applying the third layer.
Paint your mold
The next step in building your own light up letters is painting your mold. You will want to make sure that you are very careful with this process as it can be slightly tricky or even dangerous depending on what letter shape you choose.
You will need some strong, transparent gel glues such as epoxy glue or clear plastic glue. Make sure to mix them properly and apply a thin layer of glue onto each surface of your mold.
Once all the surfaces of your mold have been glued together, let the glue dry for an hour before moving on to the next stage. Now you will need to find a way to stick the printed element onto the mold.
The most common way to do this is using hot melt printing. This means heating the back side of the element until it melts and then sticking it into the dried glue on the front of the mold.


Comments
Post a Comment